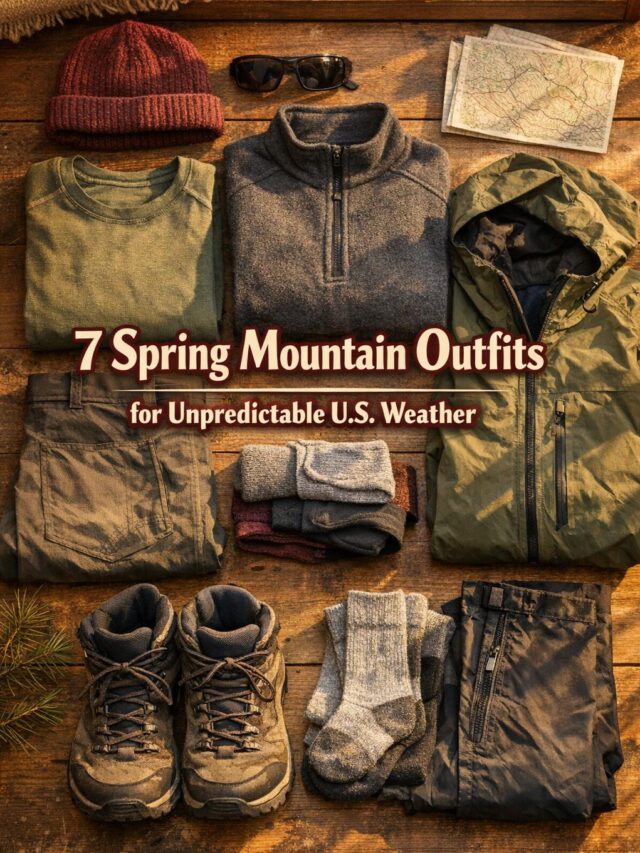
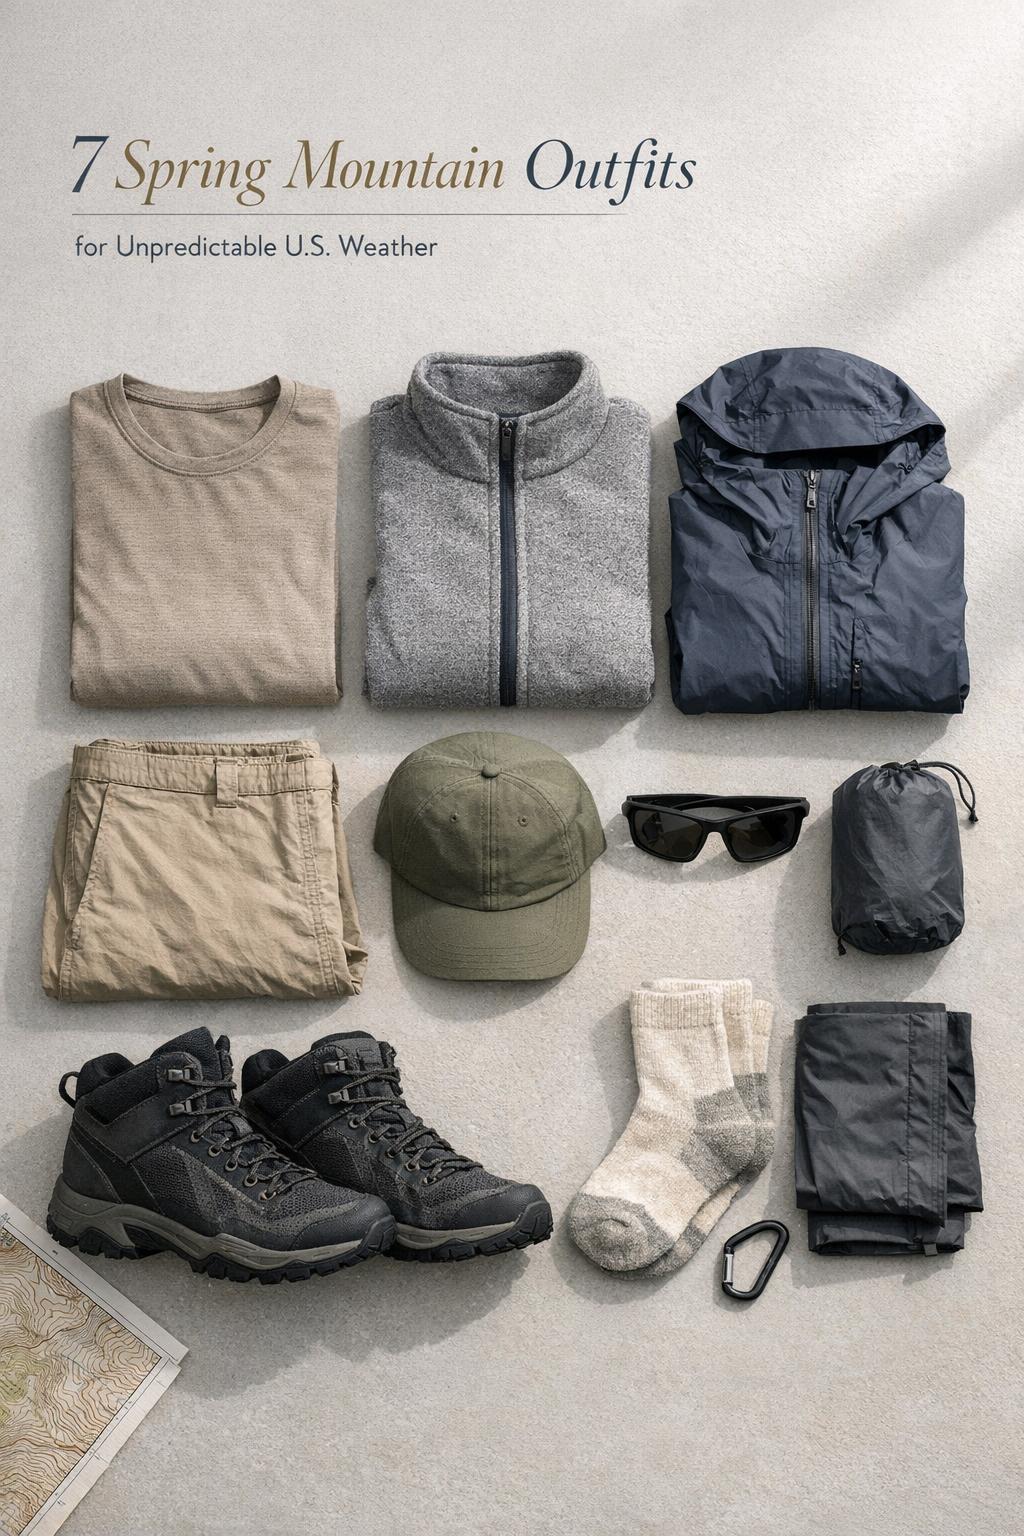
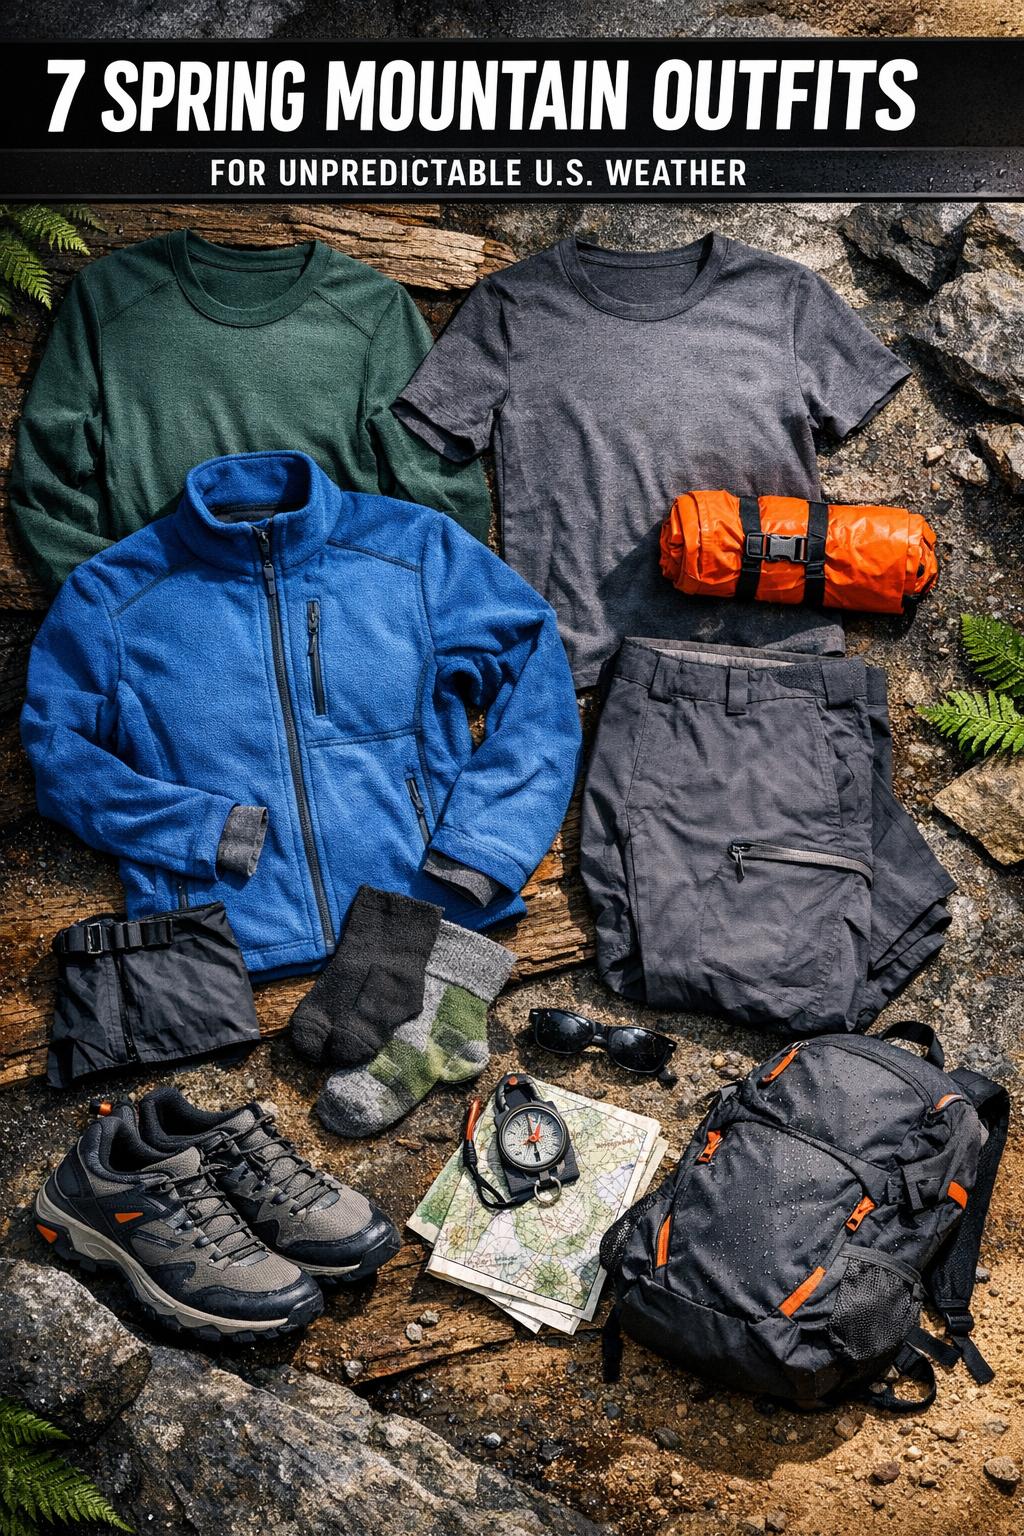
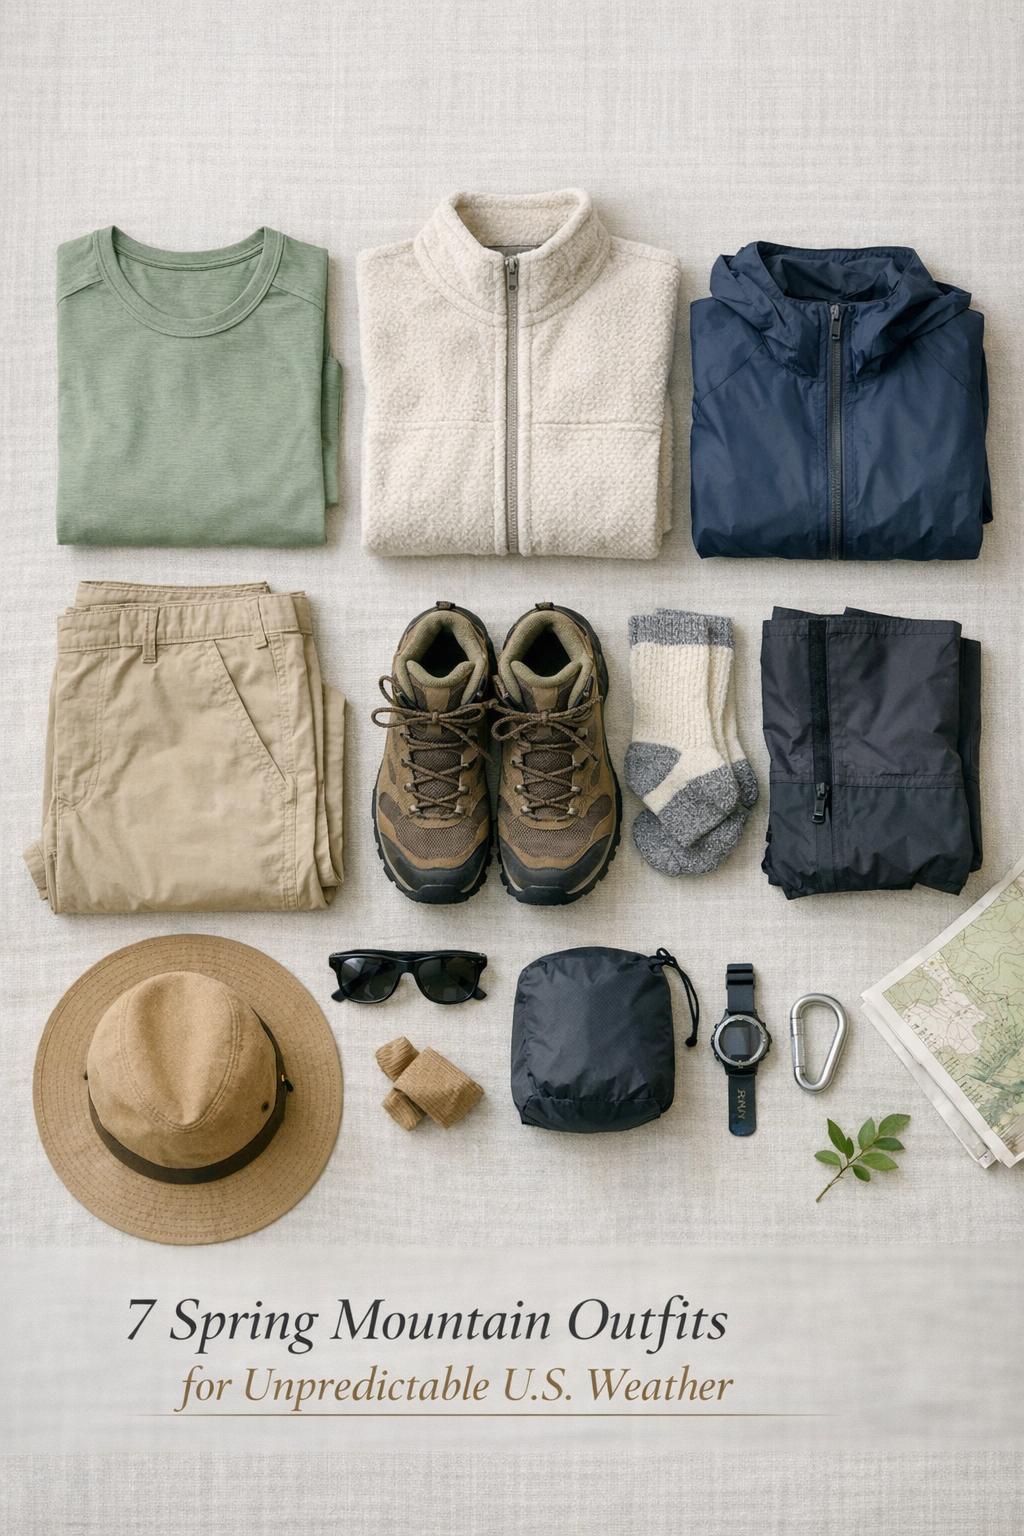
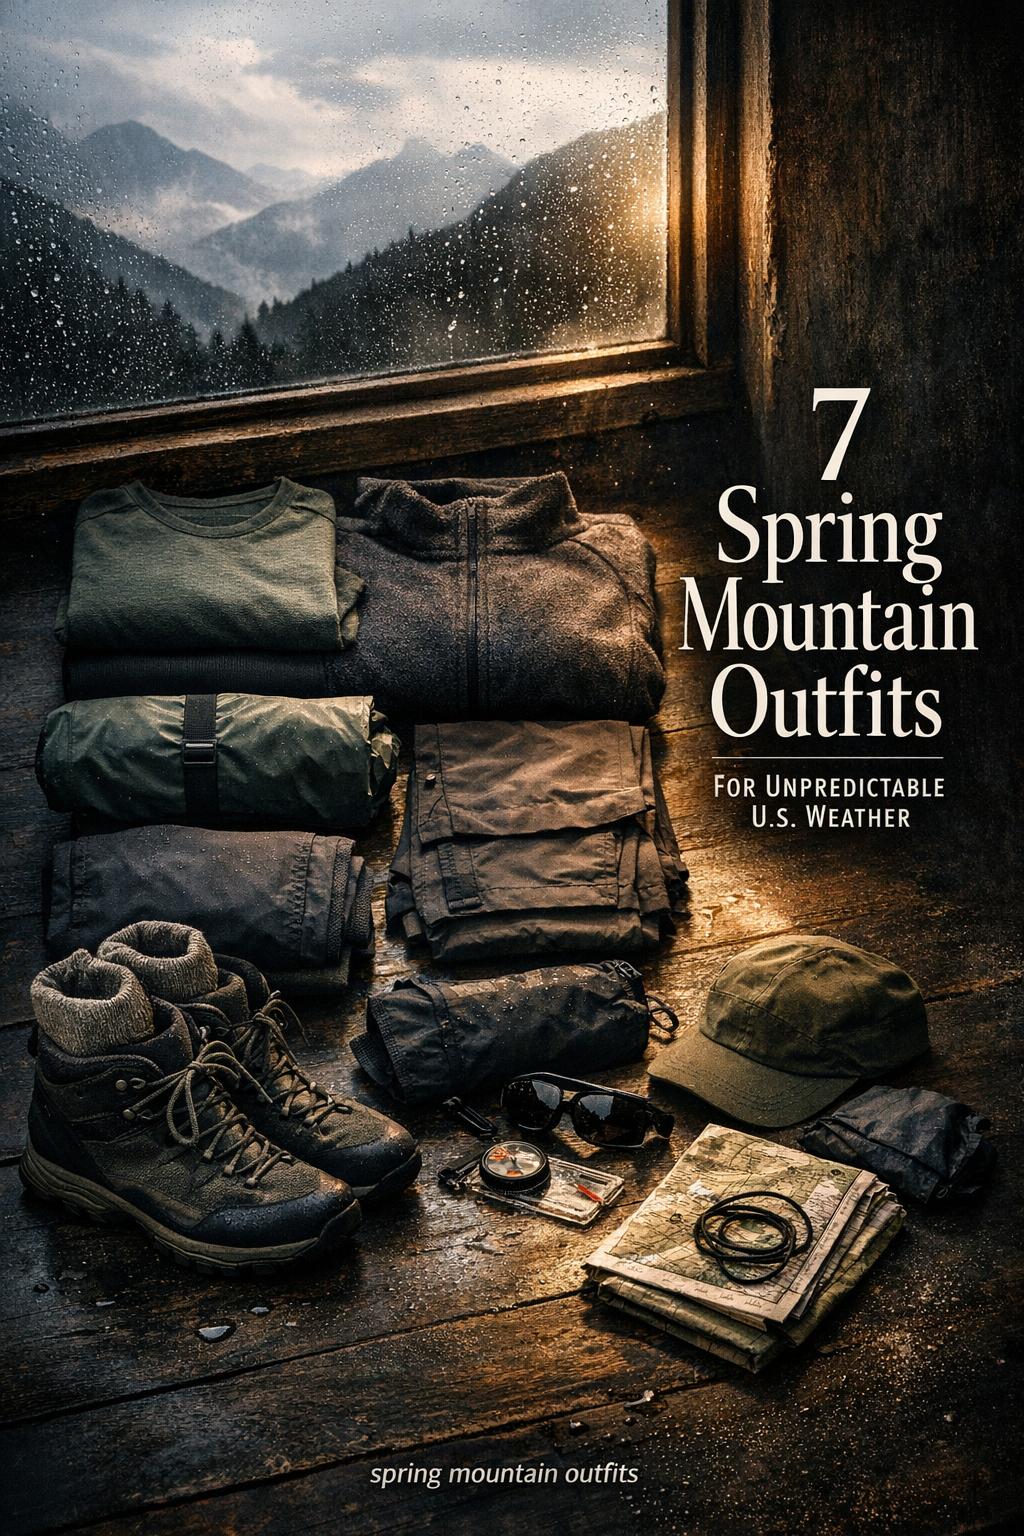
7 Spring Mountain Outfits for Unpredictable U.S. Weather
Spring Mountain Outfits: The Definitive Guide to Layered, Weather-Proof Mountainwear for Spring Hiking
This post may contain affiliate links. As an Amazon Associate, we earn from qualifying purchases.
Spring mountain outfits need to do one job extremely well: adapt. A single hike can move from chilly shade to warm sun, from calm valleys to windy ridgelines, and from dry trail to sudden rain. The most reliable approach is a simple, repeatable layering system—base layer, mid layer, outer layer—supported by smart footwear, a few key accessories, and a plan for when to add or remove pieces.
This guide breaks down how to build spring hiking outfits that manage moisture, control temperature swings, and protect you from wind, rain, and sun. You’ll also find practical outfit templates you can copy, region-based playbooks for major U.S. mountain areas, shopping cues to choose pieces that perform, and a set of common mistakes to avoid.
-
 $44.99Shop this look
- Coat is nice for spring and fall.
- Great jacket with large sewn-in hat to protect head from rain.
- Great quality.
This is an affiliate link. We may earn a small commission at no extra cost to you.
07/05/2026 08:01 am GMT -
 $43.41Shop this look
- Great looking.
- Great quality & true to size fit.
- Very comfortable.
This is an affiliate link. We may earn a small commission at no extra cost to you.
07/05/2026 08:01 am GMT -

$66.00$32.59Shop this look- Attractive and well made.
- This is a fantastic bag - well constructed, good travel size, really well thought out safety features.
- The material is a strong canvas type and it has excellent anti-thief profile.
This is an affiliate link. We may earn a small commission at no extra cost to you.
07/05/2026 08:01 am GMT -

$24.99$19.99Shop this look- Cute and comfortable.
- Beautiful color and material.
- Gorgeous, flattering skirt.
This is an affiliate link. We may earn a small commission at no extra cost to you.
07/05/2026 08:01 am GMT -

$16.99$13.49Shop this look- Well-made, very attractive, extremely comfortable.
- Beautiful slim fit long sleeve shirt.
- Nice stretchy material.
This is an affiliate link. We may earn a small commission at no extra cost to you.
07/05/2026 08:01 am GMT -
 $39.99Shop this look
- The quality is great.
- Great dress for summer.
- Nice, cool breezey dress.
This is an affiliate link. We may earn a small commission at no extra cost to you.
07/05/2026 08:00 am GMT
Why Spring Mountain Weather Demands Layered Outfits
Spring weather on mountains is unpredictable by nature. You can start cold at the trailhead, heat up quickly on climbs, then feel chilled again when you stop moving or reach exposed terrain. Add in wind that cuts through thin fabrics, intermittent rain that appears with little warning, and bright sun at elevation, and it becomes clear why a layered hiking system matters.
Layering works because each piece has a clear job. A moisture-wicking base layer manages sweat so you don’t stay damp. A breathable mid-layer adds warmth without bulk and helps you stay comfortable when your pace changes. An outer layer—often a shell jacket or windproof rain jacket—blocks wind and precipitation while still letting excess heat escape when possible.
Equally important is the habit of adjusting layers early. Waiting until you’re sweating heavily or already chilled usually leads to discomfort. The goal is to stay in a “manageable” zone: not overheating, not soaking your base layer, and not losing too much warmth during stops.

The Layering System: Base Layer, Mid Layer, Outer Layer
Most successful spring hiking outfits follow the same structure, whether you’re heading into the Rockies, the Pacific Northwest, the Appalachians, or a desert-mountain crossing. Think of it as a toolkit. You’re not trying to wear everything at once—you’re choosing what to start in, and carrying what you’ll need when conditions change.
Base Layer: Materials, Wicking, and Fit
Your base layer sits next to skin, so it has to manage moisture first. The most common base layer fabrics for spring hiking outfits are merino and synthetics, chosen for wicking and odor control. The big rule is to avoid cotton for active mountain days, because it tends to hold moisture and can leave you feeling cold once you slow down or the wind picks up.
Fit matters as much as fabric. A base layer should be close enough to move moisture away efficiently, but not so tight that it feels restrictive. In spring conditions, many hikers prefer a base layer they can wear alone on climbs, then layer over quickly for wind or rest stops.
Base layers also include bottoms in many setups. Whether you use a dedicated base layer bottom depends on how cold it is, how windy the route is, and how long you’ll be stopped. For many spring mountain outings, a good pair of quick-dry pants paired with a strong base layer top is the simplest and most flexible starting point.
Mid Layer: Warmth Without Bulk
The mid layer is the warmth layer, but it should still breathe. Common choices include lightweight fleece or other breathable mid-layer options that add insulation without trapping too much heat. In spring, the key is avoiding bulky warmth that forces you to remove and re-pack constantly; instead, aim for warmth that you can regulate with a zipper, sleeves, or quick venting.
A strong mid layer is especially valuable for wind-exposed ridges and for breaks. Many hikers feel great while moving uphill and then cool down fast when they stop. A warm mid-layer you can throw on quickly helps prevent that “sweat-then-freeze” cycle that can make spring mountain hikes uncomfortable.
When building spring mountain outfits, think of your mid layer as the piece that smooths out the day’s temperature swings. It doesn’t replace the shell jacket; it works under it, and it works on its own when the weather is stable.
Outer Layer: Wind, Rain, and Sun Protection
Your outer layer is your weather shield. In spring mountains, that usually means wind protection plus the ability to handle rain when it appears. A shell jacket or windproof rain jacket is often the difference between continuing comfortably and spending the rest of the day feeling chilled.
Not every hike needs the same shell. Some days call for a lightweight, packable shell you carry “just in case.” Other days call for something more protective when rain is likely or the route is exposed. The goal is to have an outer layer that you can put on quickly, that doesn’t feel like a sweat trap, and that pairs cleanly over your mid layer.
Spring sun can be strong, especially when terrain opens up. Many spring hiking outfits also rely on sun protection through coverage and UPF-oriented options. Whether that’s a sun-protective outer piece or a layered combination that keeps skin covered, your outer strategy should consider both wind and sun, not just rain.
Tips: Before you leave, decide which layer is your “move layer” and which layer is your “stop layer.” For many people, the move layer is the base layer (or base + a light mid layer), and the stop layer is the mid layer or shell you add the moment you pause. This simple habit reduces sweat buildup and keeps comfort consistent across changing conditions.
Regional Playbooks: How to Dress for 4 U.S. Mountain Regions
A layering system is universal, but spring hiking attire still needs regional tuning. Weather patterns, humidity, and the balance of wind/rain/sun can change dramatically across the U.S. Use these regional playbooks as starting points, then adjust based on your specific trail, elevation, and exposure.
Pacific Northwest and Coastal Ranges
In the Pacific Northwest and coastal ranges, rain hiking gear and a dependable waterproof shell tend to matter more often than in drier regions. Spring can bring wet conditions, and even a mild day can feel colder when you’re damp and wind hits open sections of trail.
Focus on a moisture-wicking base layer, a breathable mid-layer that stays comfortable during steady movement, and an outer layer you can trust when rain shows up. Because the goal is staying warm while wet conditions threaten, make sure your shell is easy to deploy and that your layers underneath won’t leave you clammy once the jacket goes on.
Rocky Mountains and High Elevations
In the Rockies and at higher elevations, wind can be the biggest comfort killer in spring. A windproof shell paired with a warm mid-layer is a common backbone for spring mountain outfits in this zone, especially when ridges and passes are part of the route.
Plan for bigger temperature swings: you may feel warm on climbs and significantly cooler at the top or during stops. A layering system that’s easy to adjust—base layer for moisture, mid layer for insulation, shell for wind—helps you stay steady as the environment changes quickly.
Southwest and Desert-Mountain Crossings
In the Southwest and desert-mountain transitions, the balance often shifts toward sun protection and lightweight layers. The same trail can involve intense sun exposure and then cooler air when you climb or when wind funnels through open terrain.
Prioritize sun protection hiking clothes and coverage you can tolerate during movement. Choose lightweight layers that breathe, then keep a shell ready for wind or surprise weather. In this region, it’s easy to under-pack wind protection because the day feels warm—until you step onto an exposed section and the temperature drops fast.
Appalachians and Eastern Ridges
In the Appalachians and eastern ridges, humidity-ready layers and breathable pants can make a noticeable difference in comfort. Spring conditions can feel warm during movement, and moisture management becomes central to avoiding that sticky, damp feeling that can linger after a climb.
Build your spring hiking outfits around breathability: a moisture-wicking base layer, a breathable mid-layer that you can add during cool moments, and an outer layer that protects from wind and rain without turning into a sauna. Managing sweat is often the deciding factor for comfort here, especially on rolling terrain where your effort level changes frequently.
Tips: If you’re unsure which playbook fits your hike, choose the one that matches the dominant “discomfort risk” you expect that day: prolonged wetness (PNW), sustained wind and exposure (Rockies/high elevation), strong sun and light-but-variable conditions (Southwest), or humidity and sweat management (Appalachians). Then use the same layering system and simply adjust the emphasis.
Footwear, Socks, and Gaiters: Ground Truth for Spring Mountain Trails
Spring mountain outfits aren’t just about what you wear above the waist. Footwear and socks influence comfort from the ground up, especially when trails shift between wet, dry, muddy, or uneven sections. The right combination reduces hot spots, helps manage moisture, and supports steady movement across changing surfaces.
Many hikers weigh trail shoes vs boots based on the route and personal preference. What matters most is choosing a style you can walk in comfortably for the full duration of your hike and pairing it with moisture-wicking socks that match your fit. In spring, damp conditions can show up without warning, so sock choice is not an afterthought—it’s part of your moisture management system.
Gaiters can be useful on spring trails when debris, lingering wet patches, or muddy sections are common. They’re not mandatory for every outing, but they can help keep your lower legs and footwear cleaner and reduce the annoyance of trail grit that builds up over the day.
- Choose footwear you trust for the day’s terrain and duration rather than forcing a one-style-fits-all approach.
- Use moisture-wicking socks as a baseline for spring, especially when you expect variable conditions.
- Consider gaiters when your route is likely to include muddy sections or persistent trail debris.
10 Spring Mountain Outfit Templates You Can Copy
Outfit templates remove guesswork. These spring hiking outfit templates are built around the same core: moisture-wicking base, breathable mid-layer, and an outer layer for wind, rain, and sun. Use them as mix-and-match outfits, then adjust based on your region and how quickly you heat up while moving.
Each template includes practical shopping cues so you can translate the idea into pieces you already own or can add to your kit over time.
- Template 1: Cool start, steady climb — Base layer top + quick-dry pants + mid-layer packed + shell jacket packed; shopping cues: moisture-wicking base, breathable mid-layer, packable shell.
- Template 2: Windy ridgeline day — Base layer + warm mid-layer + windproof shell; shopping cues: wind-focused outer layer, mid-layer that adds warmth without bulk.
- Template 3: Rain-likely forecast — Base layer + breathable mid-layer + waterproof shell; shopping cues: rain hiking gear emphasis, outer layer that goes on fast.
- Template 4: Sun-forward route — Base layer that feels comfortable in heat + lightweight layers + sun protection strategy; shopping cues: coverage, UPF-oriented choices, sunglasses and hat pairing.
- Template 5: Stop-and-go photography pace — Base layer + warm mid-layer ready to deploy + shell accessible; shopping cues: mid-layer that’s easy to put on/off, shell that packs small.
- Template 6: Humidity management day — Moisture-wicking base + breathable mid-layer + breathable outer option; shopping cues: airflow, quick dry, avoid sweat traps.
- Template 7: Short hike, big variability — Base layer worn + mid-layer in pack + packable rain shell; shopping cues: compact layers that cover “what if” weather.
- Template 8: All-day mountain outing — Base layer + mid-layer + shell + extra focus on socks and footwear comfort; shopping cues: comfort-from-the-ground-up, reliable layering pieces.
- Template 9: Cold morning trailhead, warm afternoon — Start with base + mid layer; shed mid layer during climb; add shell for wind; shopping cues: zipper/venting options, easy layer transitions.
- Template 10: Simple capsule outfit — One base layer you love + one lightweight fleece + one shell jacket + quick-dry bottoms; shopping cues: versatile neutrals, mix-and-match compatibility.
Tips: Pack your shell and mid-layer where you can reach them quickly. The faster you can change layers, the more likely you are to do it at the right moment—before you overheat on a climb or get chilled on a windy stop.
Accessories and Pack Essentials for Spring Ascents
Accessories often make the difference between “fine” and “comfortable” in spring mountain conditions. They’re also the easiest way to upgrade spring mountain outfits without rebuilding your entire clothing system. Think in terms of comfort and safety: sun protection, eye protection, and the ability to handle quick weather shifts.
A few compact essentials can support your layering system: a hat for sun coverage, sunglasses for bright conditions, and a packable jacket strategy so your outer layer is always available when wind or rain arrives. Hydration also belongs in the essentials list because it supports temperature regulation and sustained comfort during climbs.
Tips: Treat accessories as “micro-layers.” A simple change—like adding eye protection or better sun coverage—can reduce fatigue and improve comfort, especially on exposed sections where the environment feels more intense than the forecast suggested.
- Sun protection gear: hat and sunglasses as baseline for exposed terrain.
- Packable rain shell or wind shell: easy to access, not buried at the bottom.
- Hydration setup: chosen for the length and intensity of the hike.
Shopping Cues: How to Pick Pieces That Perform
When you’re choosing spring hiking attire, performance usually comes down to a few clear cues: moisture management, breathability, and weather protection. You don’t need a closet full of options to build great spring mountain outfits—you need a small set of pieces that work together and cover the most common conditions you’ll face.
Start by prioritizing the base layer and outer layer. A moisture-wicking base layer is the foundation for comfort during movement, while a shell jacket or windproof rain jacket is your insurance policy when conditions shift. Then add a breathable mid-layer that fills the warmth gap without making you feel bulky or overheated.
Color-palette planning can also help you build mix-and-match outfits. If your base, mid, and outer layers coordinate easily, you’re more likely to re-wear and rotate them across different hikes. The goal is a capsule system you trust, not a collection of single-purpose items that don’t layer well together.
Finally, keep shopping cues practical and trail-based. Ask yourself: Can I hike uphill in this without overheating? Can I throw this on during a windy stop? Does this layer still feel comfortable if I get a little damp? Pieces that answer “yes” to those questions earn a place in your spring kit.
Common Mistakes and How to Fix Them
Most spring mountain outfit problems come from the same handful of mistakes: choosing the wrong base fabric, waiting too long to adjust layers, and building an outfit that can’t handle wind or rain when it appears. The fixes are straightforward once you know what to watch for.
A frequent issue is starting too warm. It feels good at the trailhead, but then you climb, sweat, and end up damp—making you colder later when you stop or hit wind. The fix is to start slightly cool and let your movement warm you up, relying on your mid layer and shell as add-ons rather than wearing everything from minute one.
Another common mistake is treating the shell as optional and packing it in a way that makes it annoying to access. If you have to stop, dig, and repack half your bag to find your shell jacket, you’ll often delay putting it on until you’re already chilled. The fix is simple: place your shell where you can reach it quickly and commit to using it early when wind or rain begins.
A final issue is relying on cotton or other materials that don’t support moisture management. If your base layer stays wet, it undermines the entire layering system. The fix is choosing a moisture-wicking base layer—often merino or synthetics—and pairing it with breathable mid layers so sweat has a path out rather than being trapped under a non-breathable outer piece.
Tips: Build a quick layering “decision tree” before you leave. Decide what you’ll wear while moving, what you’ll add for wind, what you’ll add for rain, and what you’ll put on the moment you stop. Making those decisions at home prevents indecision on the trail when your comfort depends on quick action.
FAQ
What are the essential pieces for spring mountain outfits?
A reliable spring mountain outfit is built from a moisture-wicking base layer, a breathable mid-layer for warmth without bulk, and an outer layer (shell jacket or windproof rain jacket) for wind and rain protection, plus comfortable footwear and moisture-wicking socks.
How do I layer hiking clothes in spring without overheating?
Start slightly cool in a moisture-wicking base layer, add a breathable mid-layer only when needed, and treat your shell as a quick-on tool for wind or rain; adjust early during climbs and put warmth back on immediately when you stop moving.
Is a shell jacket necessary for spring hiking?
In spring mountain conditions, a shell jacket is often the most useful “just in case” item because it can block wind and handle rain when weather shifts quickly, helping you avoid getting chilled once you’re damp or exposed.
What base layer fabric works best for spring hiking outfits?
Moisture-wicking base layers are the priority, with merino and synthetics commonly chosen for wicking and odor control, while cotton is best avoided because it tends to hold moisture and can make you feel colder when conditions change.
How should I adjust my outfit for the Pacific Northwest in spring?
Lean into rain hiking gear by prioritizing a dependable waterproof shell over your base and mid layers, keeping your layering system breathable underneath so you can stay comfortable when wet conditions and cool wind combine.
How should I adjust my outfit for the Rockies or high elevations in spring?
Plan for wind and bigger temperature swings by pairing a warm mid-layer with a windproof shell, and use the base-mid-outer system to adapt quickly as you move from sheltered climbs to exposed ridgelines and stops.
What should I prioritize for Southwest desert-mountain crossings in spring?
Prioritize sun protection and lightweight layers that breathe during movement, then keep wind and rain coverage available with a packable shell so you can handle rapid shifts when terrain opens up or elevation changes.
How do I choose between trail shoes vs boots for spring mountain trails?
Choose the option that matches your route and keeps you comfortable for the full hike, then support that choice with moisture-wicking socks to manage damp conditions that are common in spring.
What are the most common layering mistakes in spring, and how do I avoid them?
The most common mistakes are wearing cotton, starting too warm, and delaying layer changes; avoid them by using a moisture-wicking base layer, starting slightly cool, and keeping your mid layer and shell easy to access so you can adjust before you get sweaty or chilled.


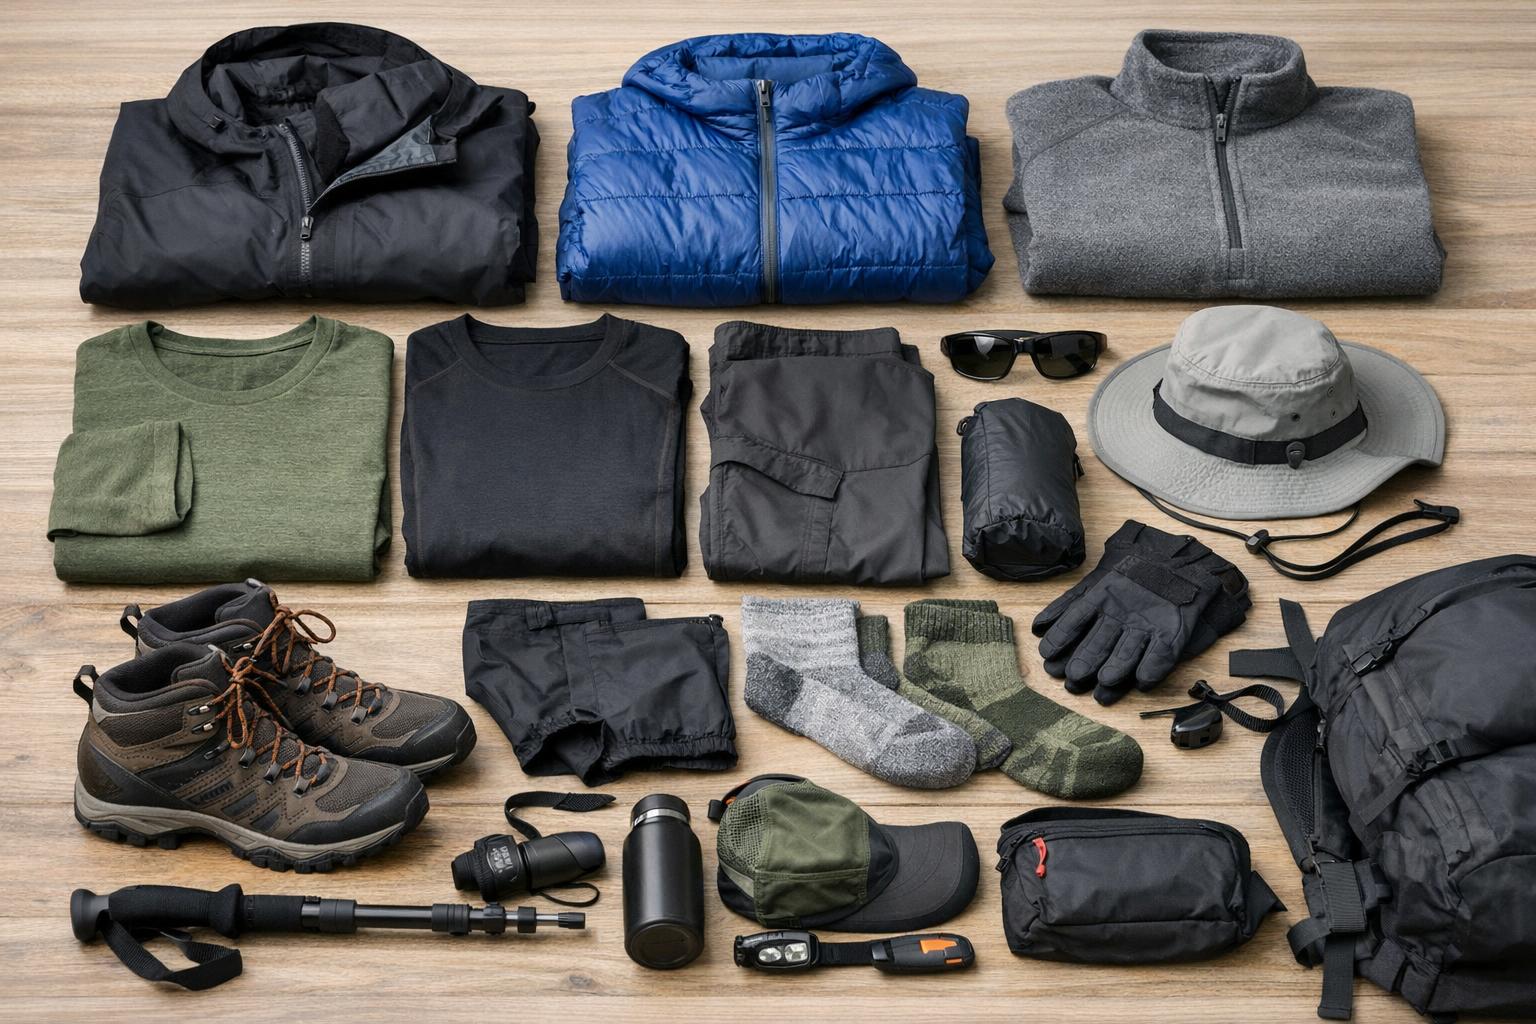
Love this post! Can you please link the hiking boots in the first photo with the orange laces? Or just supply the brand? Thank you!!
Thank you! 😊 The hiking boots in the first photo are the Columbia Redmond hiking shoes. Hope that helps!